
An explanation on how to use drip irrigation as the ideal watering system for raised beds due to its water efficiency, improvement of plant health, and ease of use for home gardeners.
How to Install a Drip Irrigation System in Raised Beds
Are you looking for affordable automatic garden watering solutions? Do you have raised garden beds or multiple vegetable garden patches? Then, you need a watering system that efficiently distributes water to all rows and columns, and that’s drip irrigation.
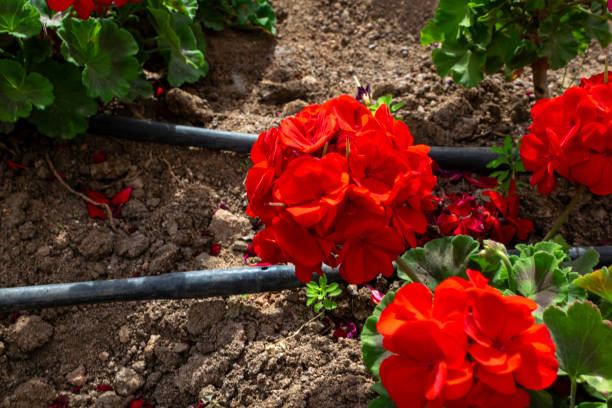
Drip irrigation setup is a watering system typically used for raised bed gardens because of its mechanism. It combines multiple smaller drip tubes into a central water source, such that each drip tube caters to a specific garden bed.
If you want to learn how to install a drip irrigation system in raised beds, automate its operation with a smart sprinkler timer, and maintain your tubes throughout the year, keep reading.
Author’s Note: Check out our post Drip Irrigation Setup for a Smarter Garden if you would like a more general (non raised bed specific) drip irrigation overview.
Benefits of Drip Irrigation in Raised Beds
If you’ve never used a drip irrigation setup, you may not understand how much better and more efficient it is when compared to other watering systems.
Saves Water
As an eco-conscious gardener seeking water-saving gardening methods, you can stop here, as the drip irrigation system does the job perfectly. With this method, you minimize waste from evaporation and run-off since the water sinks directly into the soil.
Direct Root Watering
You get higher raised bed watering efficiency with drip irrigation when the individual tubes feed water directly to the roots.
Healthier and Consistent Growth
When you combine direct root watering with water-saving efficiency, you get sustainable garden irrigation. Consequently, you build stronger plant roots and achieve more consistent growth, which supports a long-term, healthy garden.
Cost-Saving and Eco-Friendly Advantages

Using affordable automatic garden watering solutions, such as the drip irrigation system, saves you money on water bills, prevents run-off, and aligns with sustainable gardening practices.
A Cost-Saving Technique
When you install water-saving garden systems, you automatically conserve water and lower your water bills. But that’s not the only cost reduction it offers.
Think of the ripple effect of having a good irrigation system. You get healthier soil and a bountiful yield, which reduces the cost of soil repairs.
An Eco-Friendly Method
The drip system is also a reliable and eco-friendly irrigation method due to its distribution technique. It strengthens your vegetable roots and builds the soil’s resilience through deep watering, rather than run-offs that encourage weed growth.
Here are some tools you need for a budget-friendly drip irrigation system.
Tools and Materials You’ll Need
Found On Amazon
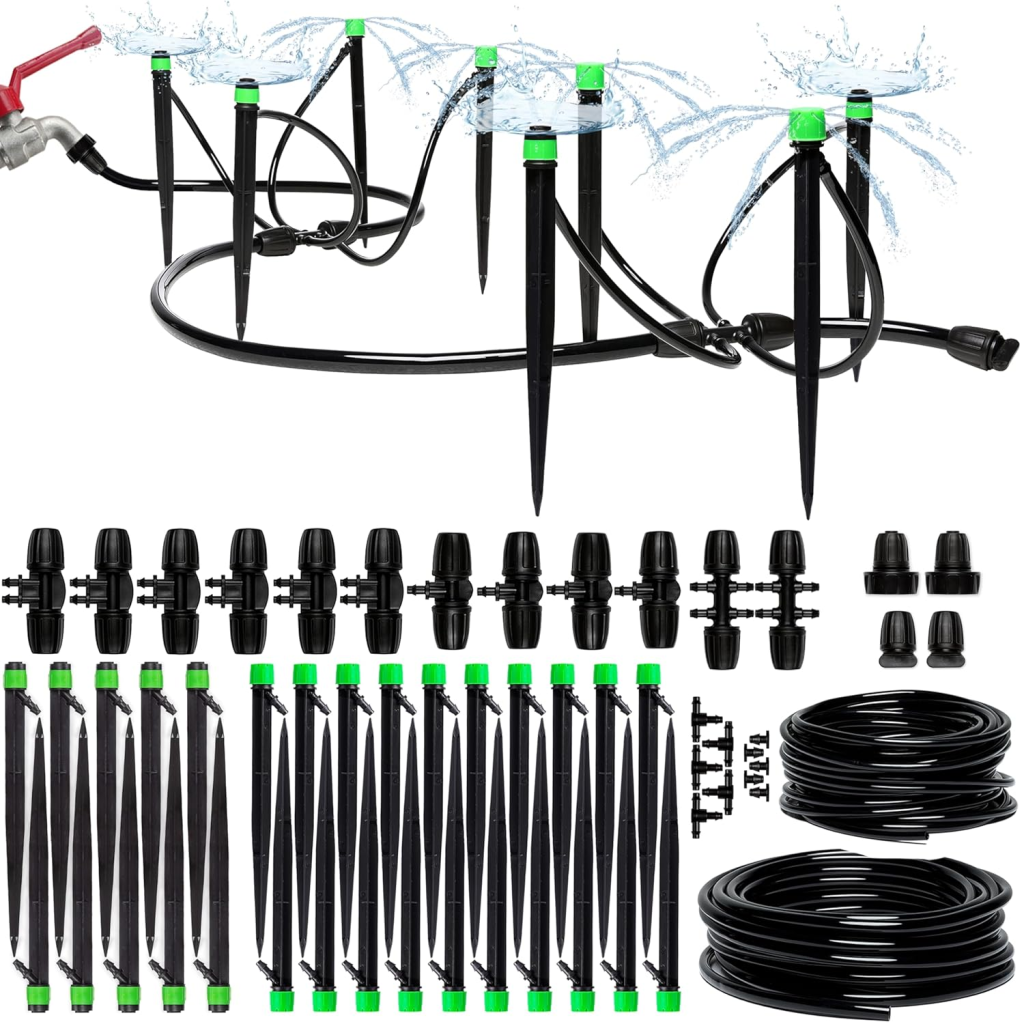
To achieve a flawless watering system using this method, you need these drip irrigation kit essentials:
- Tube
- Connectors
- Drop emitters
- Adapter
- Automated timers (Optional)
Tube
You need a main tube that’s about ½ inch wide and smaller tubes that are about ¼ inch wide each. The smaller tubes should be as many as your garden beds. Also, note that the length of your tube depends on the size of your garden.
Connectors
Use elbows, tees, and specialized connectors to join main line tubes to drip tubes, thereby directing water flow. Also include end caps here to close off drip lines and stakes to hold each line in place on the ground.
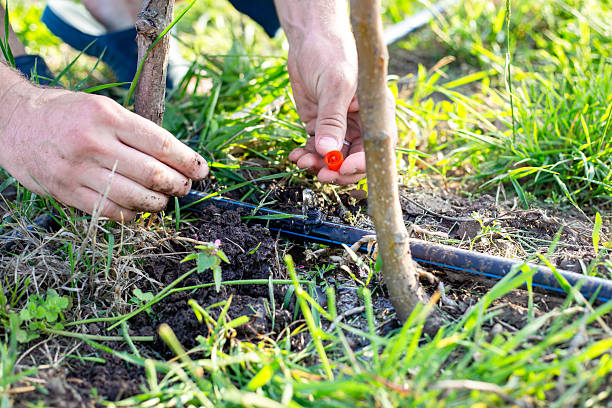
Drip Emitters
Install an emitter with a pressure system to slowly release water from the main line. Irrigation tubing and emitters work together to feed water directly to your garden beds.
Adapter
Finally, you need an adapter to connect your main line to the water source, whether it’s a tap or an underground irrigation system.
Optional Supplies
Other raised bed garden supplies that’ll improve efficiency but aren’t essential include automated timers, flush valves, and a fertilizer injector.
These are all budget-friendly watering solutions, so ensure you tick them off your list before planning your drip layout.
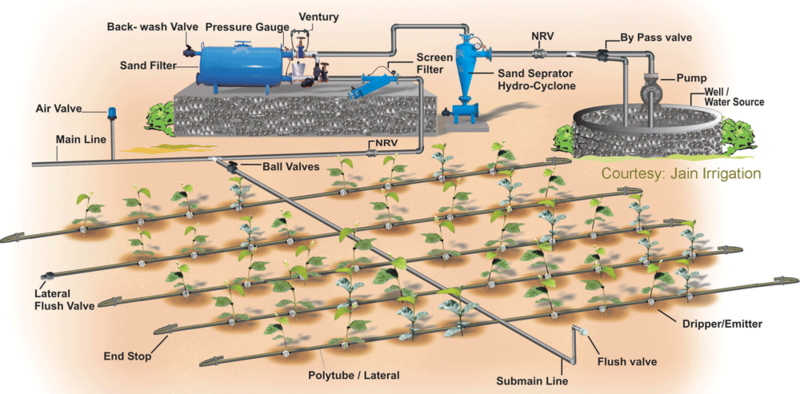
Planning Your Drip Layout for Raised Beds
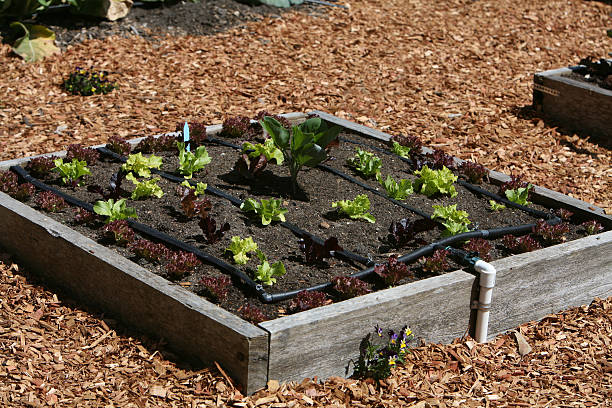
Proper drip irrigation layout planning sets the stage for efficiency. Here, you’ll learn how to measure and design your tubing layout to ensure even water coverage across the raised bed.
Measurements
Measure the length and width of your entire garden bed area first, then the individual garden beds and their distance from the main supply.
Visualization
Sketch your layout on paper by placing your garden beds and drip irrigation essentials in their designated positions. It’s best to use a scale paper here for accuracy.
Spacing
Space your drip lines with emitters at least 6 to 12 inches apart for efficient water distribution. However, if you have loose soil and plants with large roots that require more water, reduce the distance between the plants.
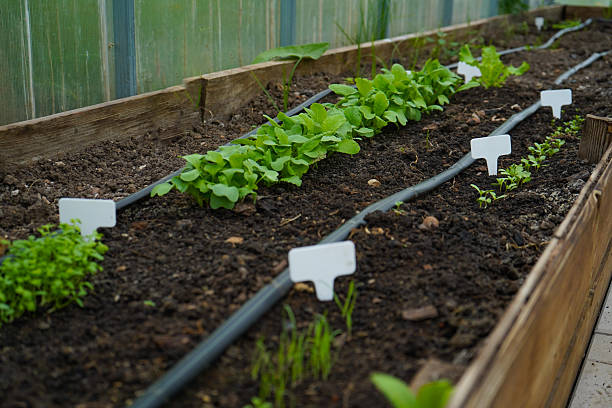
Drip Lining
The final part of your raised bed watering design is arranging your drip tubes. Aim for parallel lines that are as long as your garden bed, with one line per bed.
These garden irrigation planning tips will make more sense when you start installing.
Author’s Note: Check out our post Raised Bed Garden Layout: Spacing, Height & Path Width for an in-depth guide to setting up a raised bed.
Step-by-Step Installation Guide
Now, pay attention to this step-by-step instruction on how to install a drip irrigation system in raised beds.
Step One: Set up Essentials
Arrange all the essentials for your DIY drip irrigation setup, including your drip lines, connectors, stakes, emitters, and pressure regulators (optional).
Use your connectors to join the drip tubes and position them accordingly. Additionally, arrange your garden beds in groups according to their water needs.
Step Two: Install Emitters and Optional Timers
If you don’t have a drip tube with in-built emitters, install them yourself, then add automated timers and flush valves for more efficient water distribution.
Step Three: Arrange your Tubes
Run a main line from your water supply source to the end of your garden. Then, arrange your smaller tubes in parallel lines between each row using the spacing you measured earlier.
If you have a pressure regulator and an auto timer, add them to the tubes at this stage.
Step Four: Test System
After following the first three step-by-step stages of the irrigation system installation, test your setup. Open the main supply to check for leaks so that you can fasten them. Also, note the distribution frequency and ensure it’s even before moving on.
If you have to increase the spacing or tube length, do that. Once you determine that the drip irrigation system is running properly, add your final touches.
Step Five: Final Touches
Secure all tube ends with caps to prevent blockage and leakage. Cover your garden bed with mulch to protect your drip irrigation system and retain moisture in the soil, and then turn on your automated timer.
If you’ve used an auto timer, continue reading this beginner’s garden irrigation guide for more details.
Adding Automation with Smart Timers

Although it’s optional, adding a smart sprinkler timer to your drip irrigation system improves its efficiency.
You can set a convenient watering schedule with an app-controlled irrigation system, allowing you to live normally without worrying about missing a watering schedule.
These efficient watering timers also improve consistency, unlike the free-hand system, which lacks measurement. You can study your garden’s response to your schedule and adjust it accordingly.
Some popular, affordable automatic garden watering solutions to try include:
- Kollea
- Blumat classic
- Raindrip
Maintenance and Seasonal Care
Periodic drip irrigation maintenance ensures it remains functional, durable, and efficient; however, it can be challenging for beginners. You’ll have to clean your water filter, check emitters, and adjust the system for different seasons to keep it running smoothly.
Here are some seasonal garden watering care tips to help you manage your drip irrigation system effectively.
Seasonal Watering Care
Your raised bed garden upkeep requirements change with every season due to environmental and climatic factors.
Spring
Spring is the beginning of the growing season, which means your garden needs more water. Run the system at least once a week or every other week, depending on your plant’s water needs.
Summer
In the summer, the weather becomes hotter and drier, so you need to increase your watering frequency to twice a week, maintaining a depth of 1 to 2 inches below the soil.
Cover your garden bed with mulch to retain moisture during dry heat and prevent overwatering.
Fall
As the weather starts to cool down in the fall, your watering frequency should also decrease. Start watering once every other week.
Winter
Your plants rarely need moisture in these months because it’s the frostiest season, so reduce watering to once a month or avoid it completely. Cover your drip irrigation system when not in use to prevent it from freezing.
Irrigation Troubleshooting Tips
If you notice your watering system isn’t working properly, then try these irrigation troubleshooting tips:
- Check the tubes for blockages from debris and clear them
- Check the water pressure and adjust it to be higher or lower
- Plug leakages by fixing the connector and stakes
- Fix the valve by disassembling it and cleaning whatever caused the blockage
Conclusion: Mastering Drip Irrigation for Raised Beds
Installing a drip irrigation setup using the step-by-step instructions in this guide makes it a fun, easy activity.
You can get the essentials at a budget-friendly price, but opting for the optional add-ons is a worthwhile upgrade. For example, adding a smart sprinkler timer to the water supply source makes the distribution more accurate and convenient, nd a flush valve keeps the drip irrigation system clean and durable.
So, the question shouldn’t be whether you should get these affordable automatic garden watering solutions for your raised garden beds, but which one and when.

1 thought on “How to Install a Drip Irrigation System in Raised Beds for Effortless Watering”